
While for some, this aspect of our passion is clear and simple, for others who are new to our sport, it raises several questions.
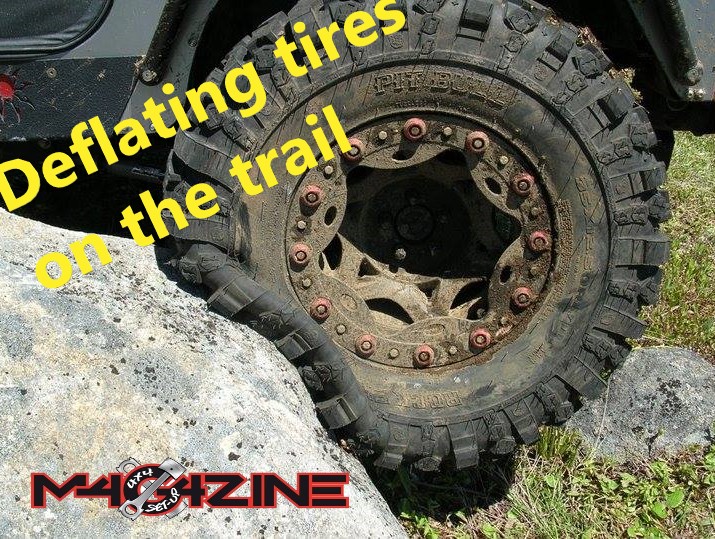
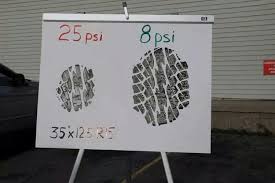
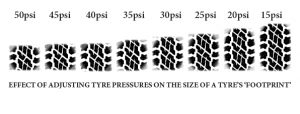
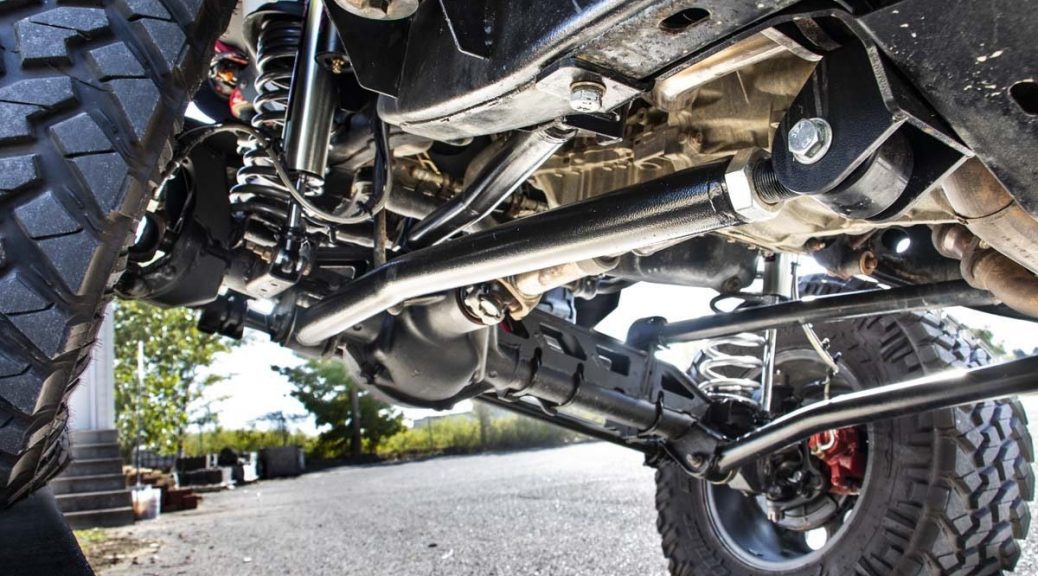
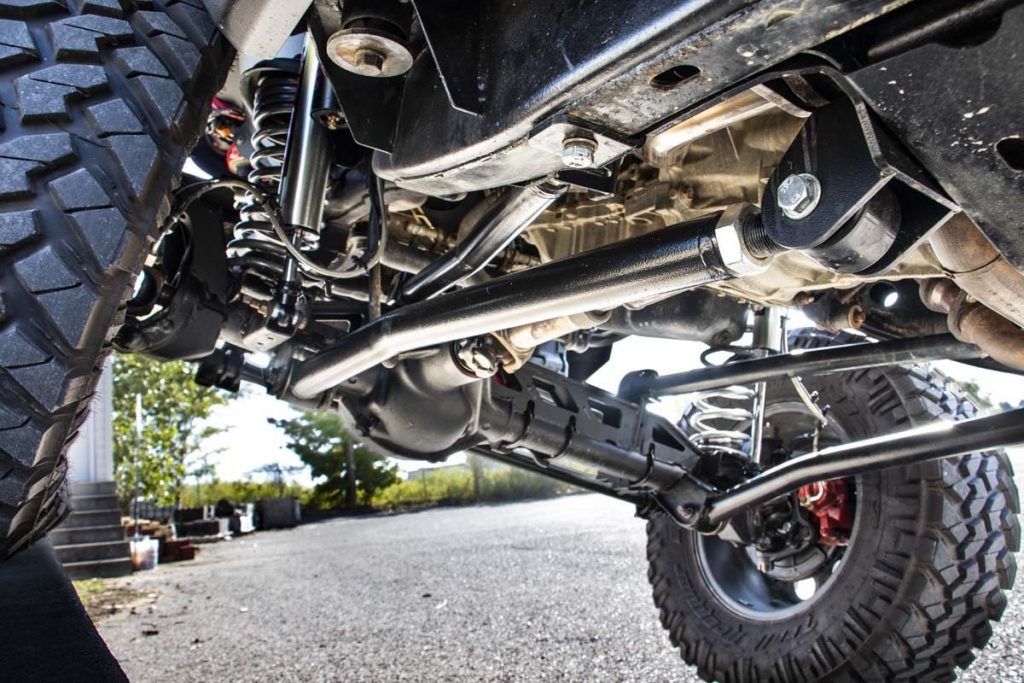
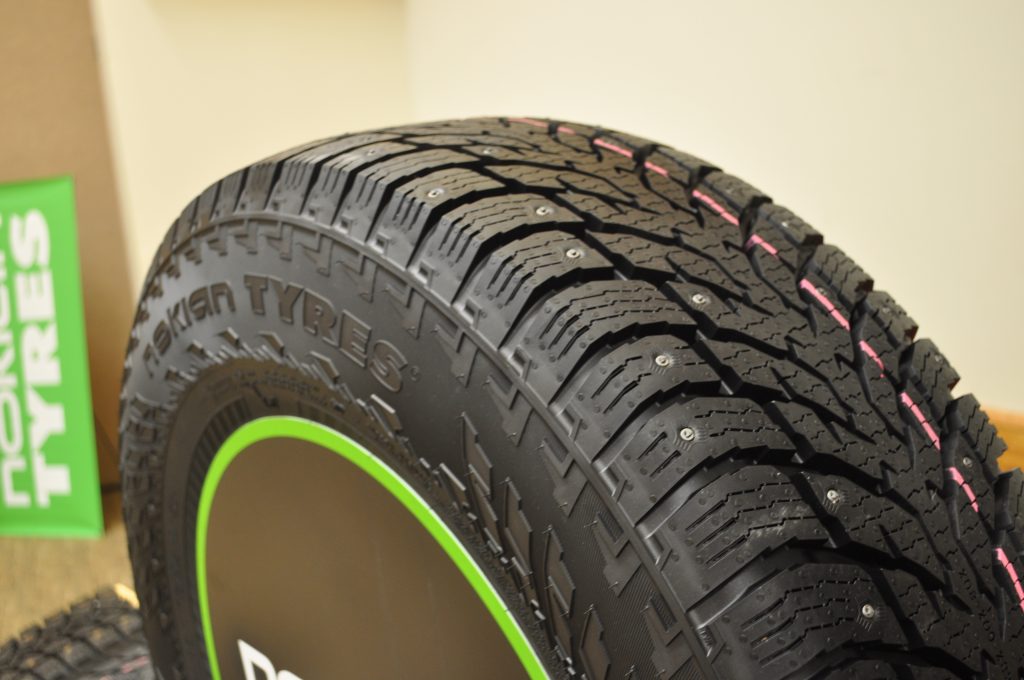
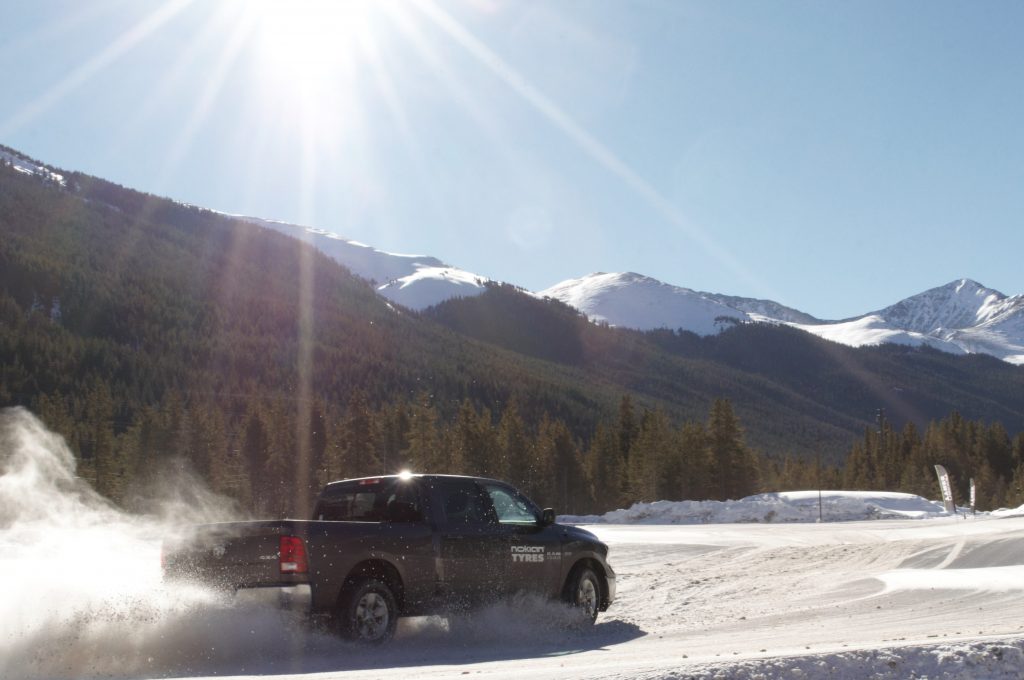
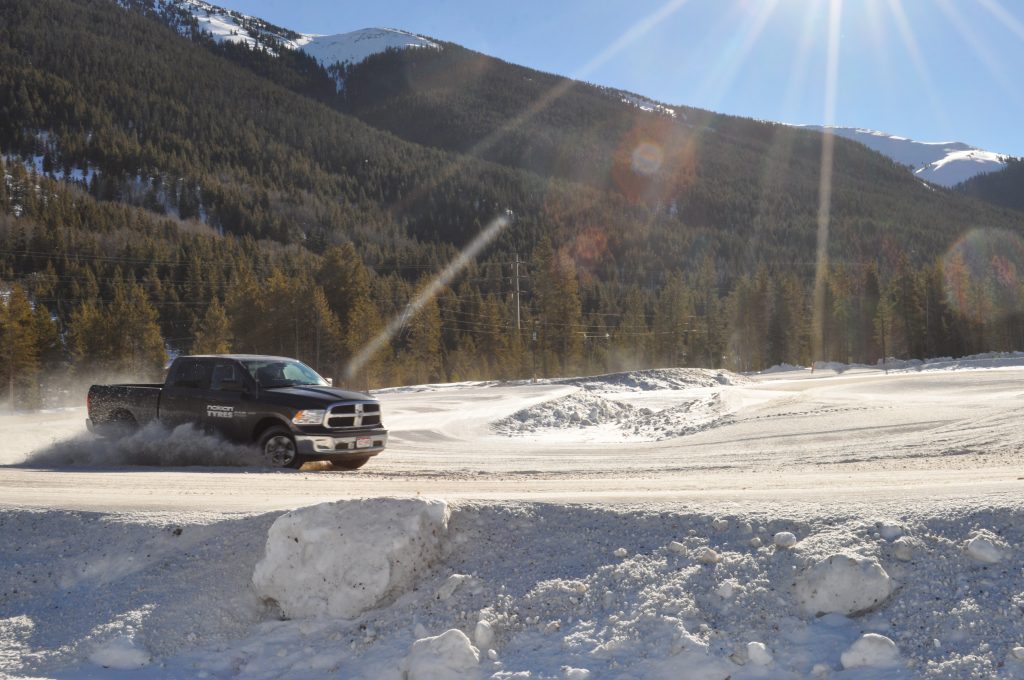
First of all, what is the advantage of deflating our tires during our trail rides? Well, it’s pretty simple, loosening the air will greatly increase the size of your footprint. Therefore, you will have a greater quantity of studs in contact with the ground.
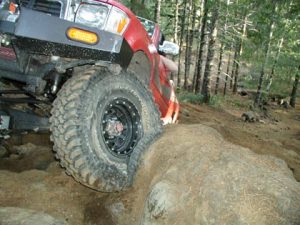
Riding at low pressure on the trail makes a smoother ride, and also helps the tire absorb shock, unlike a tire with a larger volume of air. To a certain extent, this protects you from punctures, because a soft tire will deform around a sharp rock, instead of puncturing while remaining rigid and offering a flat surface.
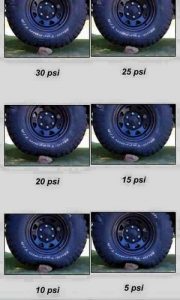
In my opinion, one of the most important things to consider before deflating is: how are we going to reinflate after the trail. For those who use trailers to transport their 4×4 vehicle, this is not really an issue since they will be able to take care of it back home. For those who will be returning to the trail afterwards, it will be imperative to blow out the tires after the trail for safety reasons. On a hard surface like asphalt, it could be extremely dangerous to ride at very low pressure, main reason is you will have poor handling during turns on a paved road.
So, there are several options for inflation, there is something for everyone and especially for every budget.
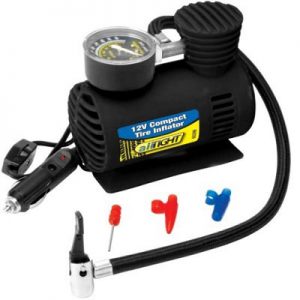
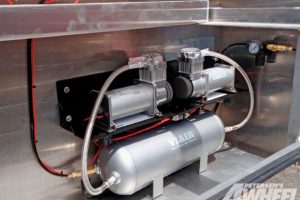
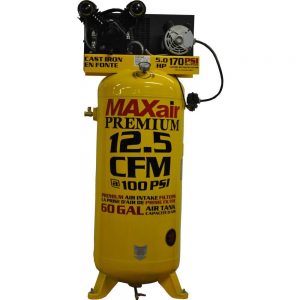
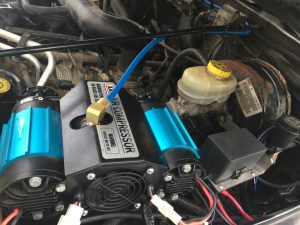
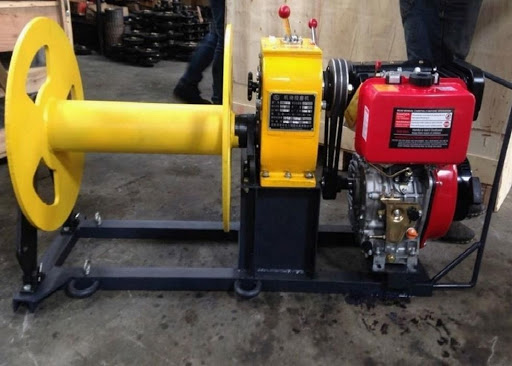
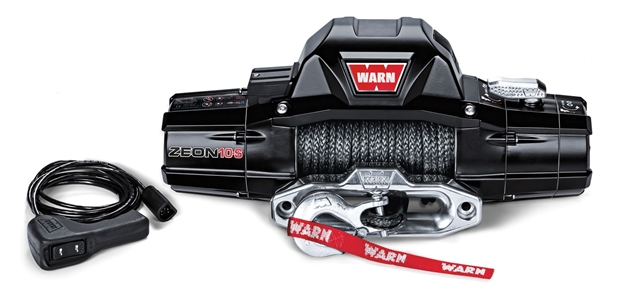
-Compressor, there are several compressors on the market, from the small one that plugs into your cigarette lighter to the big one that plugs directly into your vehicle’s power. The small model can help out and many will tell you that it is perfect for them. In many cases it ends up overheating, especially if your tires are oversized… There are also compressors that are plugged directly into the vehicle’s power supply, which is what I personally use. You have to shop around because the prices can be quite high depending on the option you choose. In my case, I opted for a large double ARB model that allows me to inflate and operate air tools when needed on the trail. There are other smaller models from ARB that do the job nicely, as well as several other manufacturers offering different models.
So, an important thing to know when shopping for your compressor, you need to choose the right compressor that will be able to meet the requirements of your trail needs. In doing so you will need to look at several details, but here are two very important ones:
PSI: Pounds per Square Inch, is the pressure generated by the compressor. Kind of like the force at which you blow through a straw. The higher the psi number the more air is compressed by the machine. So, if you want to use your system to run air tools, you need to make sure you have enough psi for the different tools. The required psi will be marked on the tools.
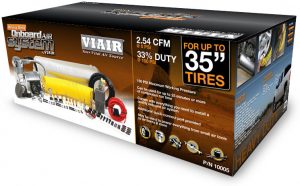
CFM: Cubic Feet per Minute, is the speed of air flow from the compressor. How fast the air is flowing through a straw, if you want to run multiple air tools simultaneously on the same compressor then you need to add up the CFM values of each. This will tell you if your compressor is pushing enough CFM to run all three at the same time.
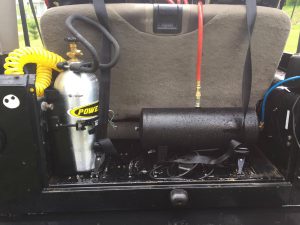
We are talking about deflating our tires on the trail, but of course the type of terrain will dictate the level of air you need in your vehicle. It is also possible in my case to add a reserve of additional air, which will allow your compressor to blow a little in case of great need.
You can also use a ((Power tank)) a compressed CO2 tank, which allows you to blow your tires in a very efficient and fast way. The only drawback is that you will have to refill it from time to time depending on the size of your tank and the frequency of use.
One of the last options is to modify your air conditioning compressor into an air compressor with a plug for your air hose, this one requires a little more knowledge to do the modifications properly.
So as mentioned, there are several options available to you, but be aware that there are certain criteria that must be observed to help you choose. Price, air flow rate, warranties and ease of installation should be considered. Note that even if you choose the compressor that pushes the most cfm for a much faster inflation, if your tire valves do not allow for a larger air volume your purchase will be limited by those valves.
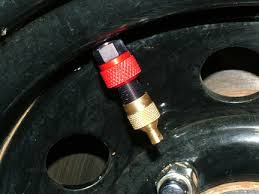
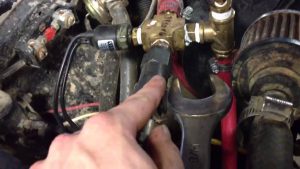
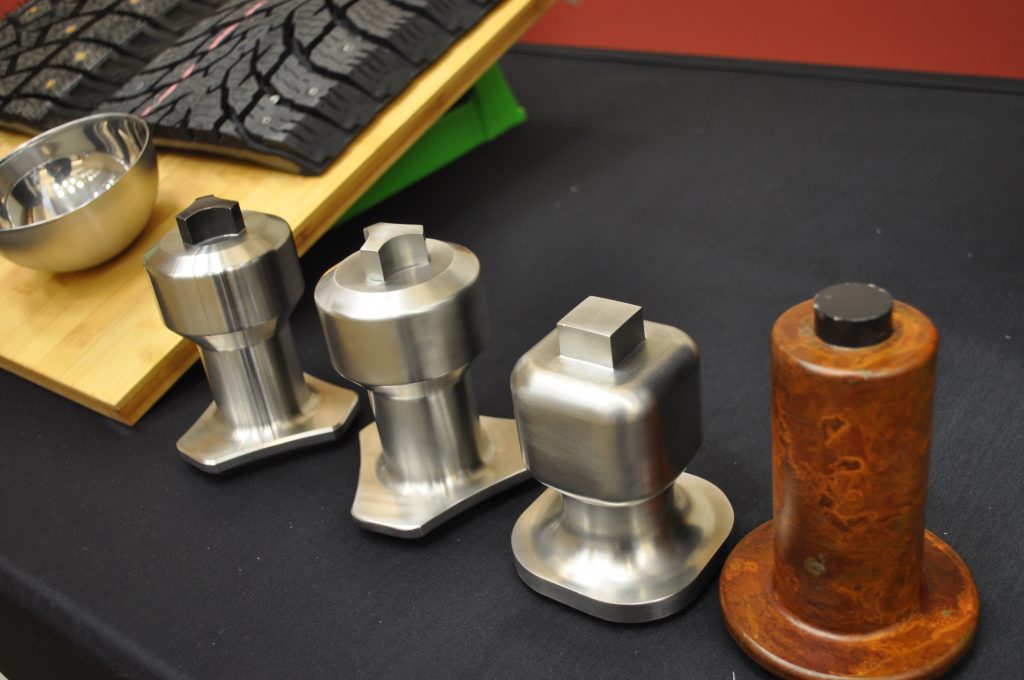
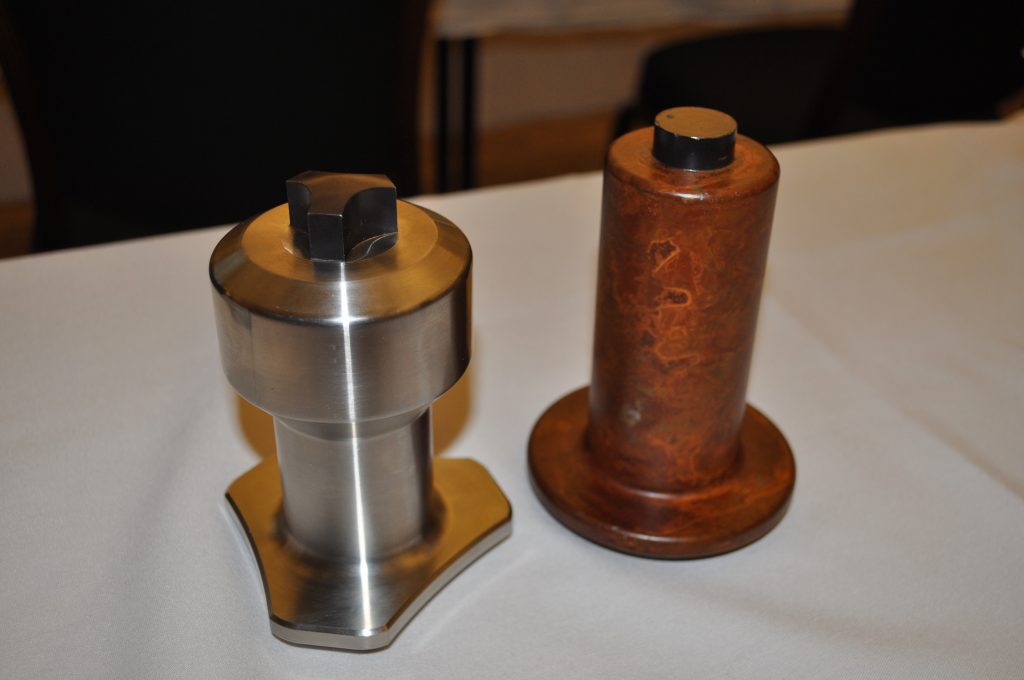
With this in mind, there is also an option available to you – Monster valves offer a much larger hole circumference than your original valves. The PowerTank company guarantees that with such valves you can blow out a 39.5×13.50 tire at 30 psi in 30 seconds or even reinflate the same tire in 40 to 50 seconds (with the right compressor of course).
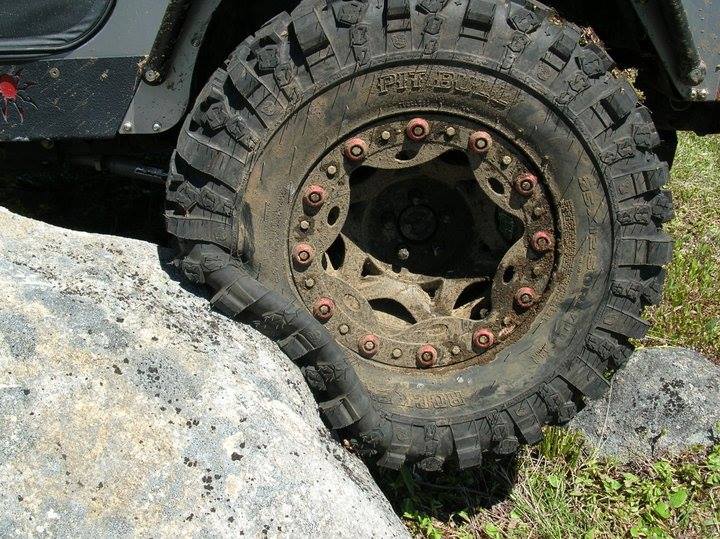
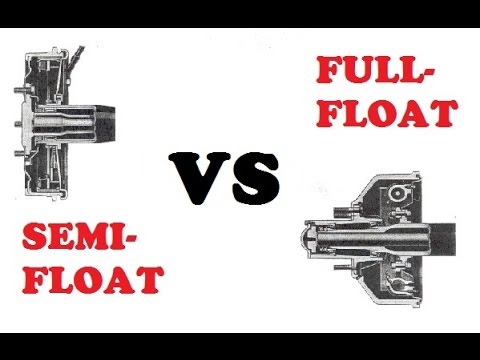
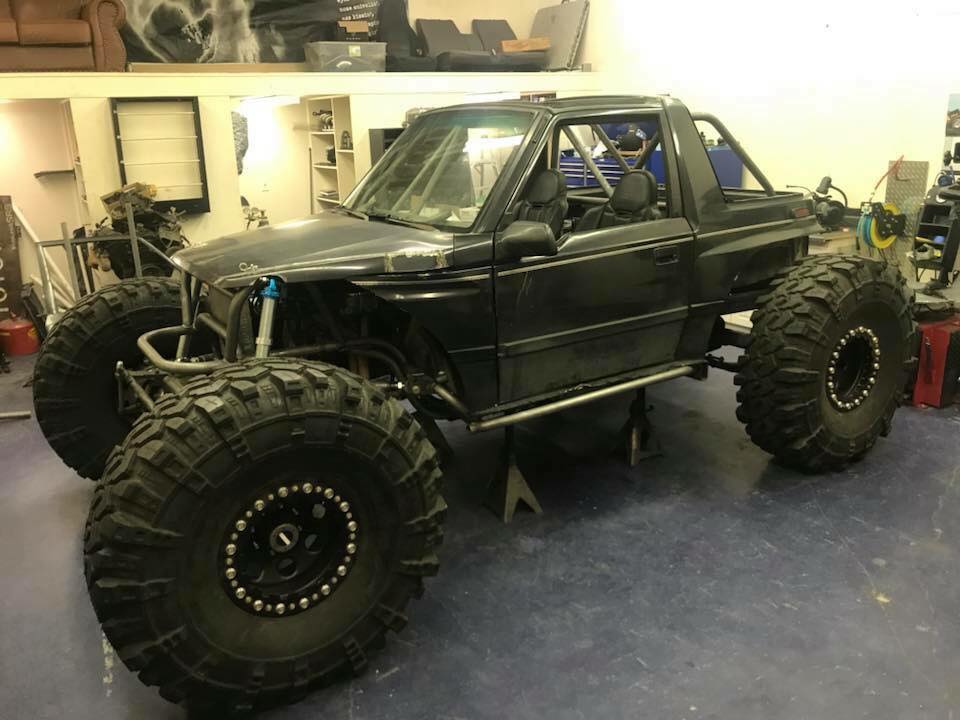
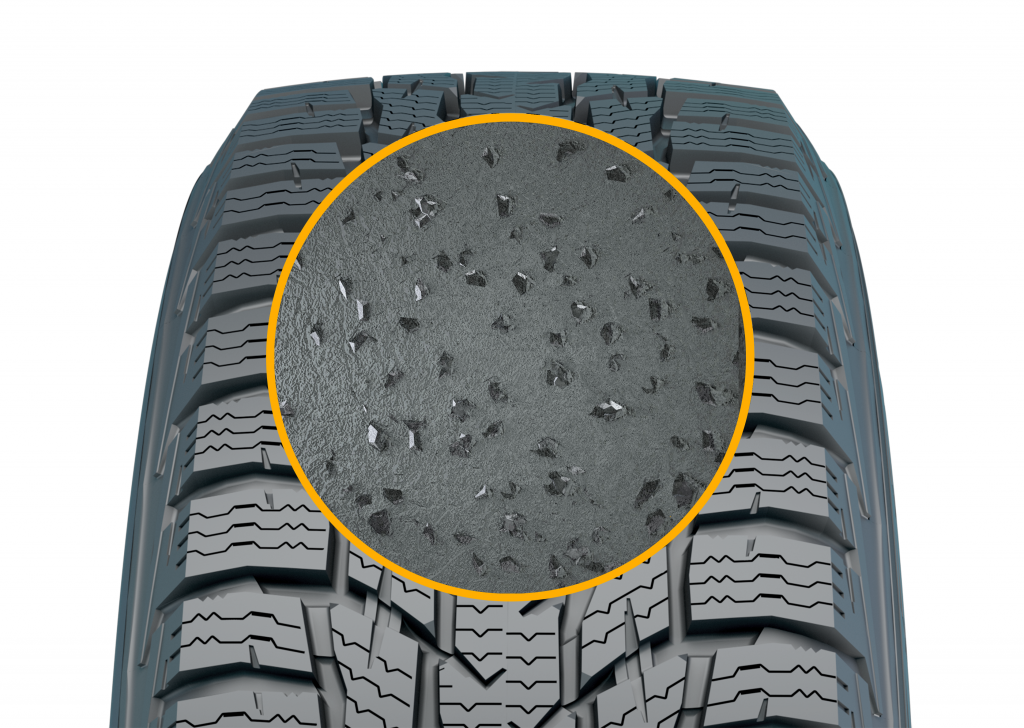
This will allow a larger volume of air to pass through the nozzle which will save you a lot of time. Another thing to keep in mind before deflating, lowering the pressure, how low do you go… One issue that can happen when the tire pressure is too low will be the tire bead will pop off the rim. The best option to avoid this problem is to instal a Beadlock, this system locks the tire in place, with this system you will be able to go as low as 5 psi and even some people ride with around 2 or 3 psi.
For those who don’t have this system, I recommend not to go below 15 psi because you will run into problems on the trail.
In conclusion, deflating your tires when you go out on the trail is a great idea. You just have to choose the right air pressure according to your needs and the capabilities of your tire/wheel setup. Don’t forget to put back the pressure recommended by the manufacturer before going back on the road.
Dave Daneault 4x4setupMagazine


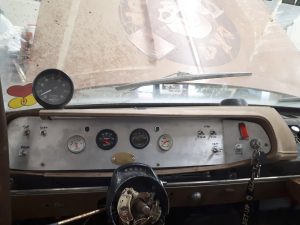
 s’attaquer au dash. Je voulais refaire celui-ci depuis que j’avais le véhicule pour n’avoir que ce dont j’avais besoin pour mon utilisation et enlever des problèmes potentiels! J’ai donc commencé par me demander, qu’est-ce que j’ai vraiment besoin de savoir ? Commençons par ce que j’avais déjà… J’avais un ampère-mètre, un gauge de température du type »cold-hot », un gauge à gaz, une lumière d’avertissement de basse pression d’huile et un
  speedomètre/odomètre. J’avais aussi rajouté un gauge de pression d’huile (parce que quand la lumière allume, il est déjà trop tard) et un tachymètre (RPM). Donc, le speedo/odo ne fonctionnait plus et avec mon ratio de gear (5.88:1) et mes pneus (39.5 »), il n’aurait pas donné la bonne lecture de toute façon. En plus, mon truck étant un rig de trail seulement, son utilité était plus que négligeable. Même chose avec le gauge à gaz, n’ayant plus le réservoir d’origine, et mon réservoir étant custom, je n’ai plus de sonde pour lire la quantité de gaz restante. L’ampère-mètre m’avais déjà donné du trouble comme on l’a vu dans l’article précédent, j’ai donc décidé de le changer pour un voltmètre. Et la lumière de basse pression d’huile ne me servait plus depuis que j’avais le gauge de pression d’huile. Pour ce qui est du gauge de température, je voulais le remplacer par un modèle indiquant les degrés question de mieux diagnostiquer les problèmes et mieux comprendre le fonctionnement de mon setup.
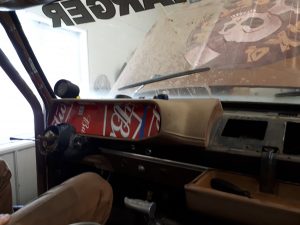
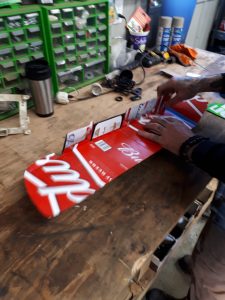 »fittait » avec mon concept et léger. On a donc commencé par se faire une maquette avec du carton (vous remarquerez sur les photos que nous avons utilisé le carton du carburant de garage le plus
  populaire!). Cette maquette nous a permis de découper notre aluminium avec les bonnes dimensions et de savoir où nous devions plier notre panneau. Pour le pliage, nous avons affaibli la ligne où on voulait plier avec un »grinder » et nous l’avons plié dans l’étau par la suite.
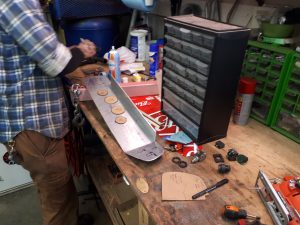 Venait ensuite le temps de choisir l’emplacement des cadrans. En ayant supprimé quelques uns des cadrans d’origine, dont le gros speedo, j’avais le choix des cadeaux! On s’est installé dans le siège du conducteur et on a marqué les zones cachées par le volant pour voir
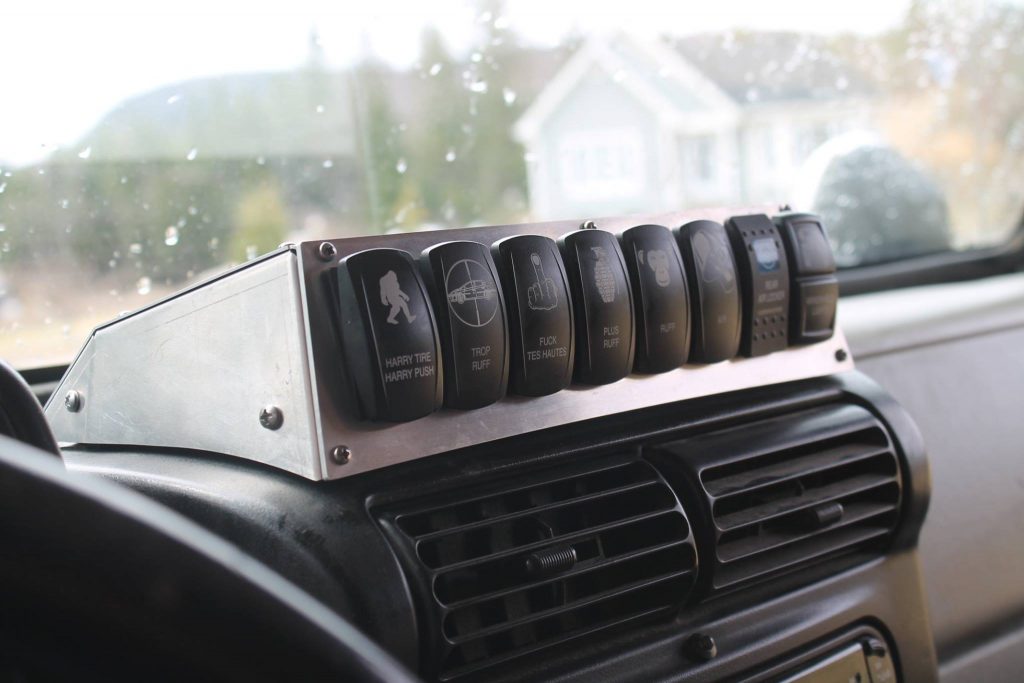
  l’espace que nous avions pour voir sans effort. Ensuite, on s’est découpé des maquettes de chaque cadrans dans du carton pour pouvoir les essayer à différents endroits et choisir ce qui me convenait le plus. On a aussi décidé combien de commutateurs j’aurais besoin pour mes
 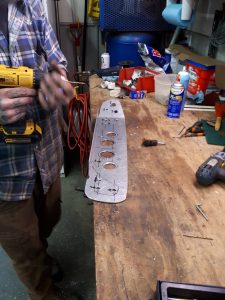 différents systèmes électriques et on les a placés à leur tour. J’ai aussi rajouté deux voyants lumineux, un pour me confirmer que mes fans électriques du radiateur sont en fonction, et l’autre pour les »hautes ».
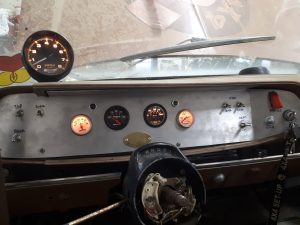
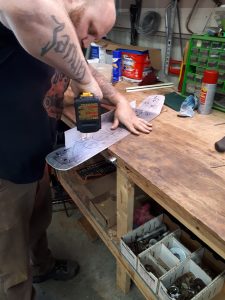 mon panneau aux bons endroits, et on a commencé l’assemblage des différents cadrans et commutateurs, ainsi que les voyants et les endroits pour visser le panneau en place. Une fois cette étape complétée, il ne restait qu’à brancher l’électricité derrière le panneau et visser celui-ci pour avoir enfin un beau dash tout neuf et fonctionnel! J’en ai aussi profité pour faire un petit clin d’oeil à mon pseudonyme sur les forums à l’époque, Southern Comfort, comme vous pouvez le voir en dessous des cadrans.
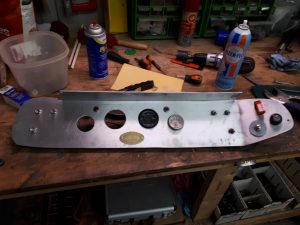
 L’attente ne fut pas trop longue parce que nous avons terminé le projet le jeudi et le samedi c’était notre premier Mudfest de la saison au club 4×4 Saint-Raymond. Le premier test arriva vite aussi, en débarquant du trailer un fil s’est défait et mon tachymètre n’affichait plus rien. En plus, bizzarement, quand j’ai stationné le véhicule, celui-ci ne
  démarrait plus. Mon chum Pat est arrivé dans l’entre-faits et nous avons trouvé le fil de tacho qui ne voulait pas coopérer et il a diagnostiqué que mon problème démarrage ne venait pas de nos modifications de filage mais bien du module de démarreur. Heureusement, j’en avait un de rechange à la maison et j’habite très près du terrain du Club.
  Donc une fois ces petits problèmes réglés, on a pu se concentrer sur les courses! La fds de tests fut concluante avec une belle 2e position dans le 8 stock et ce grâce à mon co-pilote, le fils de Patrick, Bill
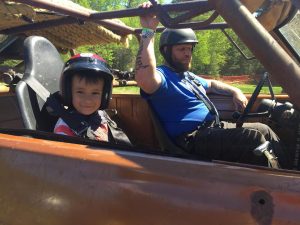 y Dessureault!
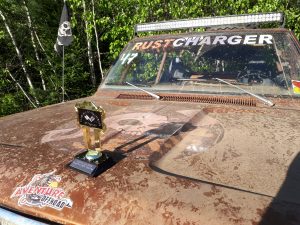
 serré sur la batterie. Ma seule petite erreur dans ce projet fut de ne pas prévoir que j’allais peut-être changé de volant parce que celui d’origine était immense et limitait ma mobilité. J’ai changé de volant depuis et mes cadrans sont maintenant légèrement cachés par celui-ci mais pas assez pour que ce soit dérangeant.
 Patrick Dessureault, proprio de HardCore Cycle, pour son travail sans relâche et je vous invite à aller voir sa page facebook :