

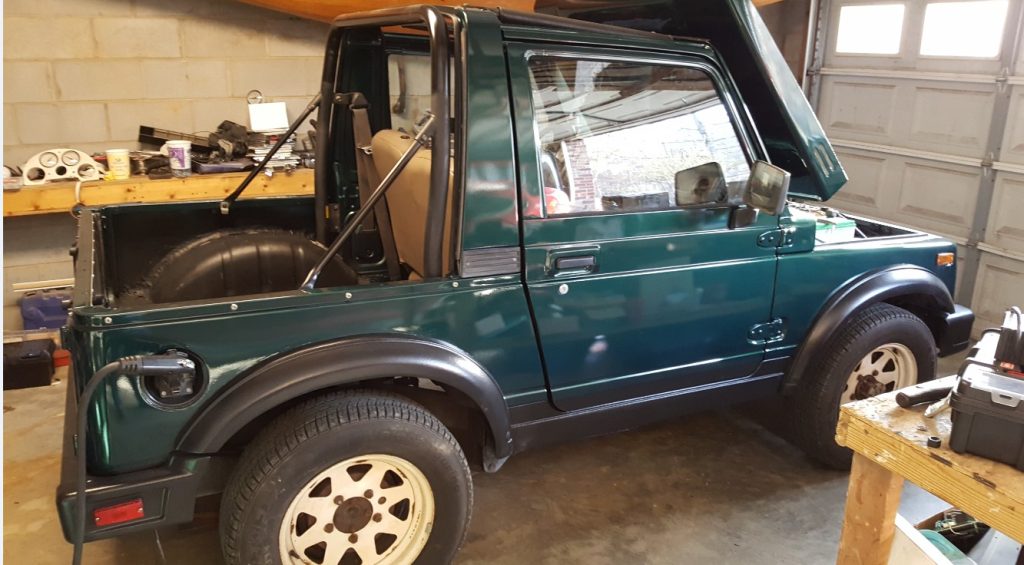
Retrofitting a Suzuki Samurai
This is the second one we have converted from ICE (internal combustion engine) to an all electric drive. The Samurai still has all wheel drive and the performance has increased, even at 115 Volts with an AC drive motor. Growing up on a farm in Iowa in the late 1970’s, we put a 283 Chevy motor in a 1941 Willies Jeep. We used that to pull hayracks or chasing cows over 640 acres. It was a great all around farm vehicle that we could take to town or on the dirt roads. Since moving to North Carolina in 2000 I connected with an Electric Vehicle group in the Raleigh area. That is when I got hooked on electric drive systems, the instant torque, the quiet ride, and most importantly – no gas. In 2010 Mike Rollins and I connected after doing independent electric conversion projects and in comparing notes, we shared many of the same experiences. Our shared experiences were good and some not so good. This is when Mike joined Green Cycle Design Group.
Our first conversion was a Factory Five 33 Ford Roadster in conjunction with Whitby Motorcars in Greensboro, NC. In 3.5 months, we built a blank chassis and body to an all electric drive.
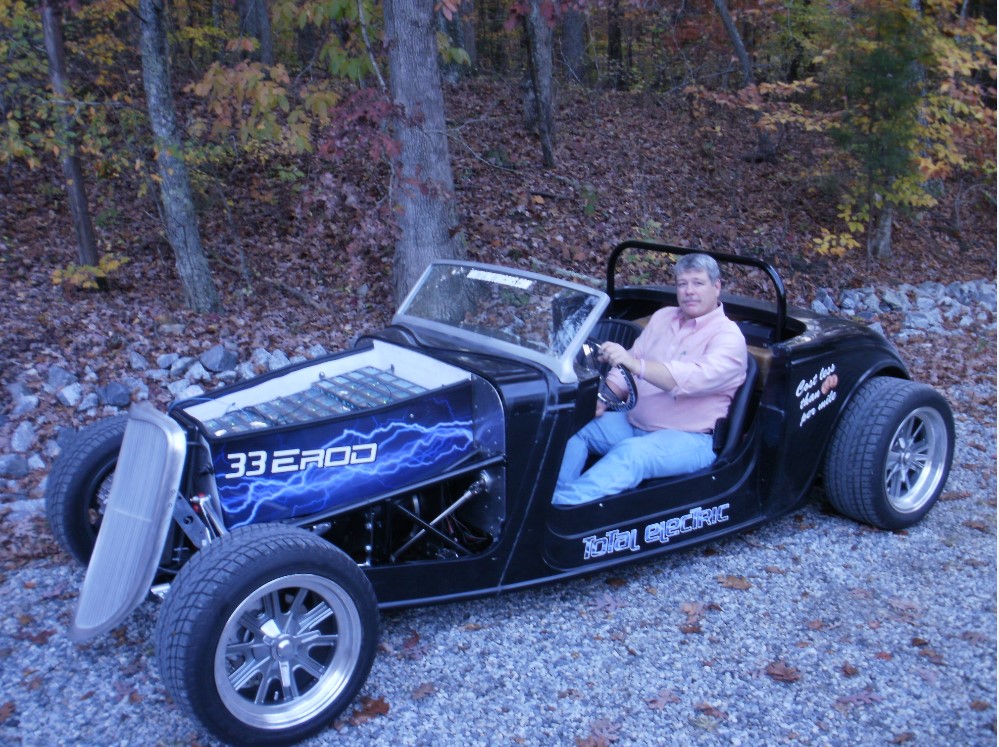
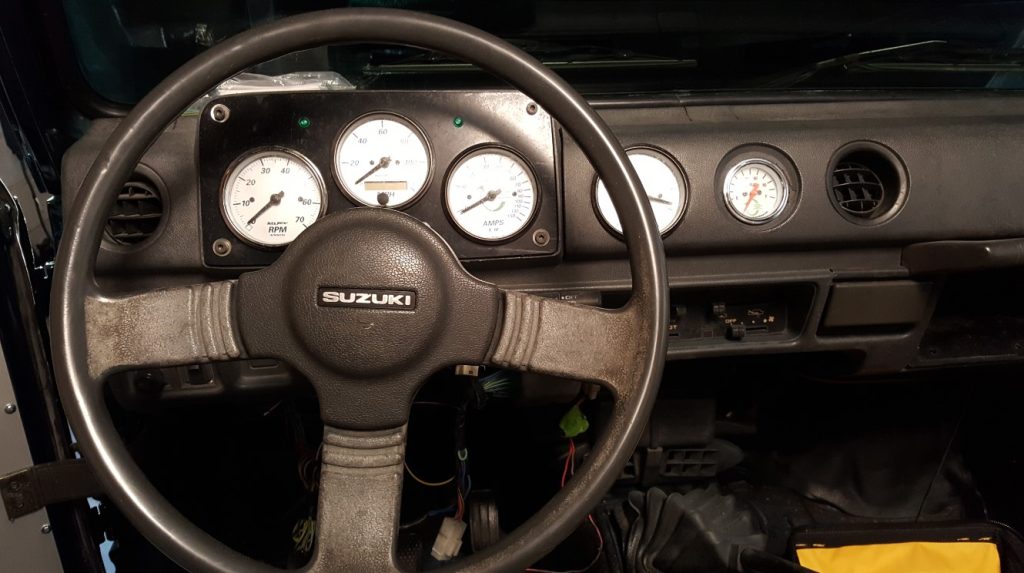
At that time Tesla was in its infancy and not a major player yet. Conversion companies were starting to take hold we were one that has survived the Tesla movement because we created four core EV components to simplify EV conversions. We invented an ignition board, 5-gauage instrument panel, lighting DOT board that has all DOT lights on individual circuits, and our own battery management system. Whitby’s employees gave us so much grief that it was board line insubordination. However, at the end of two weeks of driving time, they were fighting with each other to see who could back it out of the shop in the morning and drive it back into the shop at closing time. What a 180 turn. This roadster was the first ever EV on Charlotte Motor Speedway and yes with a top end of 140+ MPH we were keeping up with the bad boys. From that point on, we started looking for vehicles to start our conversion company. The Samurai was much like the 41 Willies I had in high school and as Paul Harvey would say, “Now the Rest of the Story”.
2: Explain us the steps of building the project, with photos in chronological order. You can of course talk about the challenges you had to face during the project.
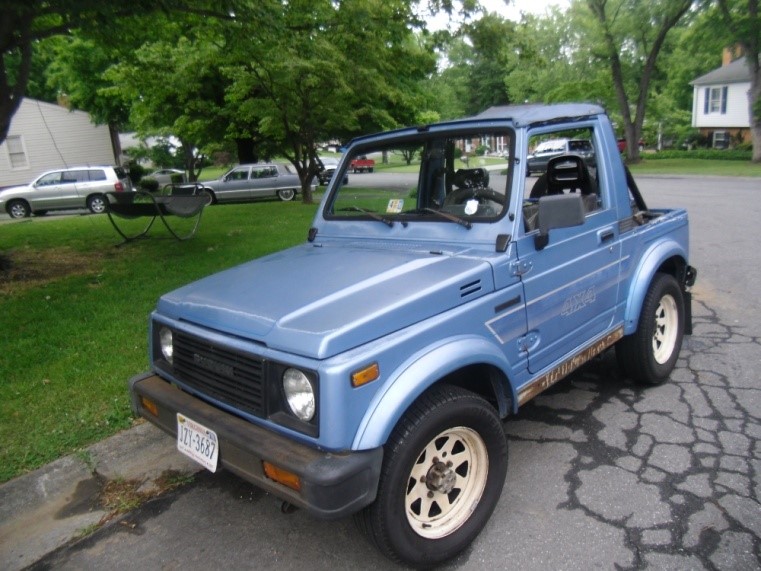
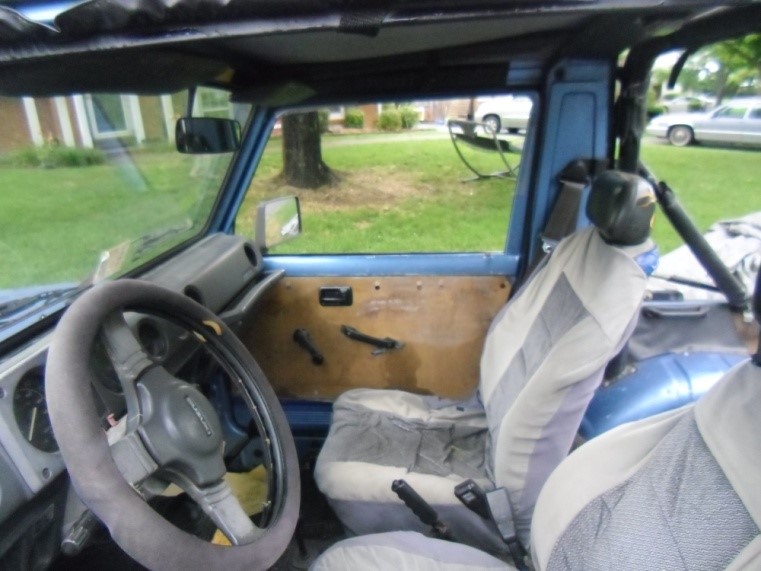
What I tell everyone is to pick a vehicle that you will enjoy driving for the next ten years or more. There are benefits such as the lighter the vehicle the better the range but if you don’t like it upon completion, it won’t give you the satisfaction you were looking for. You will put in a good deal of time and skimping on things now will lead to a disappointing end result. Been there and done that too many times. The Samurai, for me, was a perfect choice as it gave me the freedom of an open top, doors or no doors, 4-wheel drive, light weight, small turning radius and an all-around great vehicle to drive back and forth from home to work. Simply plug in at night and ready for the 30 mile commute the next day.
First is to locate the right vehicle. My partner converted a 1980 S-10 to 144 Volts DC and used lead acid for the battery storage. Three years later we removed the lead acid batteries and replaced them with lithium cells. We dropped 700 pounds and with a similar amperage pack, we went from barely 40 mile range to a good 45 mile range so weight does make a difference. We will use the Samurai from this point on and the obstacles to watch out for will be explained and will be consistent with any vehicle conversion project. We look for factors like distance from front of transmission to front of vehicle to determine motor/controller type. Next is to examine the chassis for any rust or structural weaknesses. We always clean underneath and undercoat the belly. It is much easier to clean and undercoat when everything is stripped out. With our DOT light board, we remove all wiring from this vehicle and string new wires to make sure everything works properly and it eliminates a lot of confusion later on. Last will be to locate and remove the gas tank. Take plenty of measurements and on paper or CAD, layout the possible areas where batteries can be located.
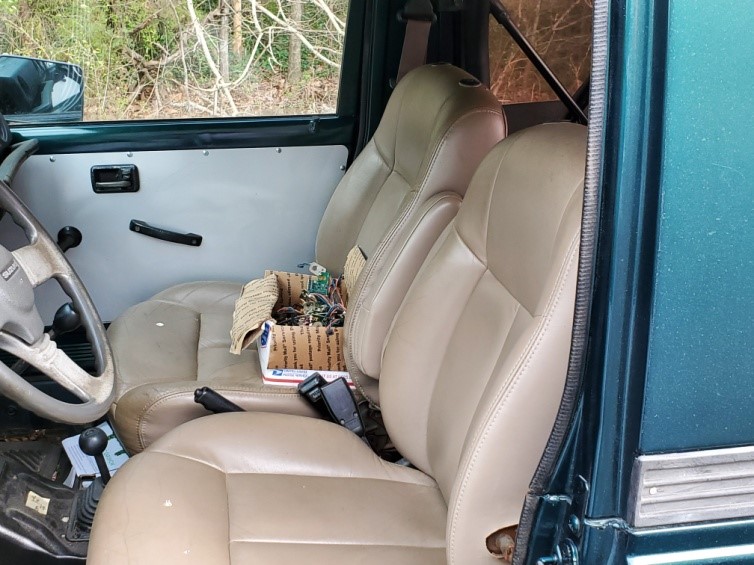
For the Samurai, we choose to use the 115V AC drive system due to limited space issues for motor/controller, additional batteries, and home designed circuit boards. Plus, spinning wheels wasn’t a big issue for us as efficiency and local transportation. The Samurai’s, at least in the 80’s, did not have computer controls for ABS brakes, etc. so we did not have to maintain a vehicle computer. This AC drive system runs 6800 rpm’s max and in keeping the manual transmission we only needed 2nd and 3rd gears. Reverse is nice but we could use the motor controller’s reversing function if we wanted. We just keep the manual reverse so it would limit the backing up speed. Using the motor controller reverse would allow the operator to back up in any gear and potentially go way too fast. If you choose a vehicle with an automatic, you will need to add a small pump to keep the torque convert running at 700 rpm’s – like that of a gas vehicle. Some controllers will allow for this function but it isn’t a practical way to operate an EV. Also, I enjoy the manual shifting and the freedom to pull things around or go rock crawling. Rock crawling with this setup is great because of the high rpm’s, low end torque, and standard high low 4-wheel and 5 speed transmission are a great setup.
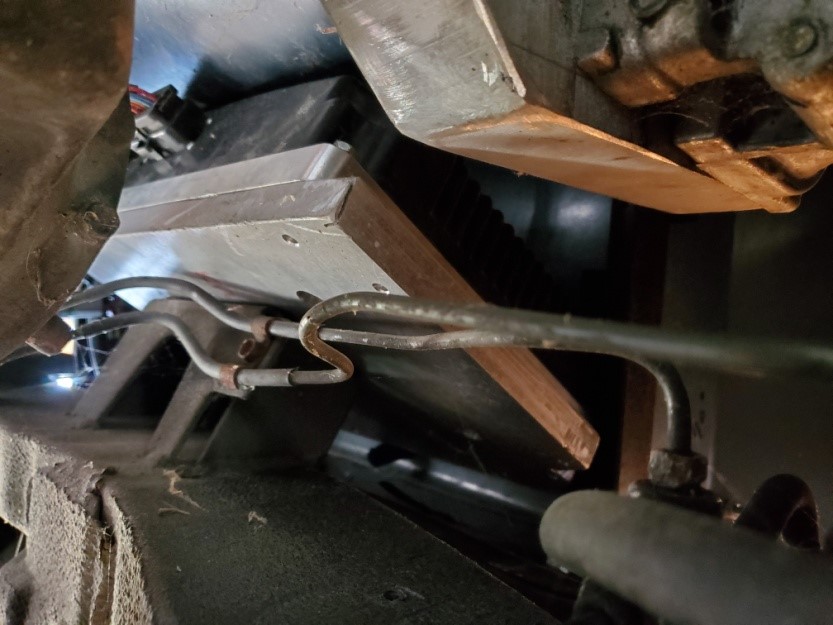
Once the motor/controller drive system is committed to, you will need to make a template of the bell housing (or locate an off the shelf adapter) and drill holes, determine the distance from the splined shaft to the motor face. This takes time and can save you about $400 to $800 but will still cost about $400 to build. Purchase a lovejoy connector with 1-1/8” diameter keyed shaft. Bore one end to press fit the center piece of the clutch plate to keep the matching splines and tig weld this piece into the bored end of the lovejoy connector. The keyed shaft will slide over the motor shaft (make sure to order the motor this way). You may have to make a spacer plate that mounts to the bell housing and the motor face plate. I used 4” thick aluminum plate and my buddy waterjet cut the patterns. I did have to tweak one hole and perfect fit. The lovejoy connector (or figuring out how to adapt the clutch plate) is necessary as the instantaneous torque will wear out the splines from the clutch plate if the rubber spider is not present (or direct connect, been there done that too). Using motors that do not have regenerative breaking allows you to remove the clutch altogether. If you have regenerative breaking then a clutch plate setup should be used in order to shift gears. Use the rubber mounting pads from the ICE and build a bracket to mount to the motor face (opposite end of the output shaft). Mount the motor controller close to the motor so the maximum current draw is not lost in resistance of long cable connections.

Battery selection is critical
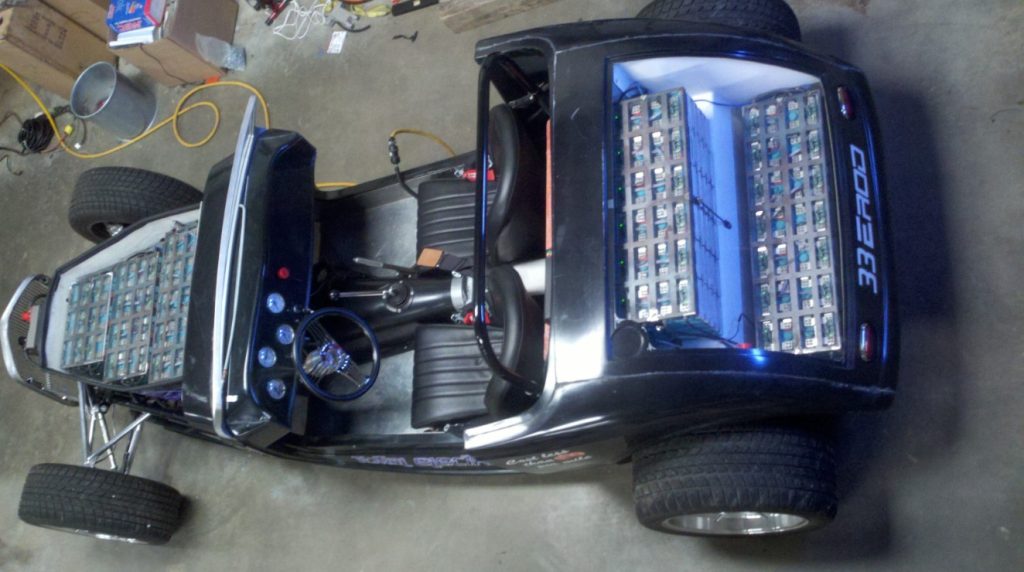
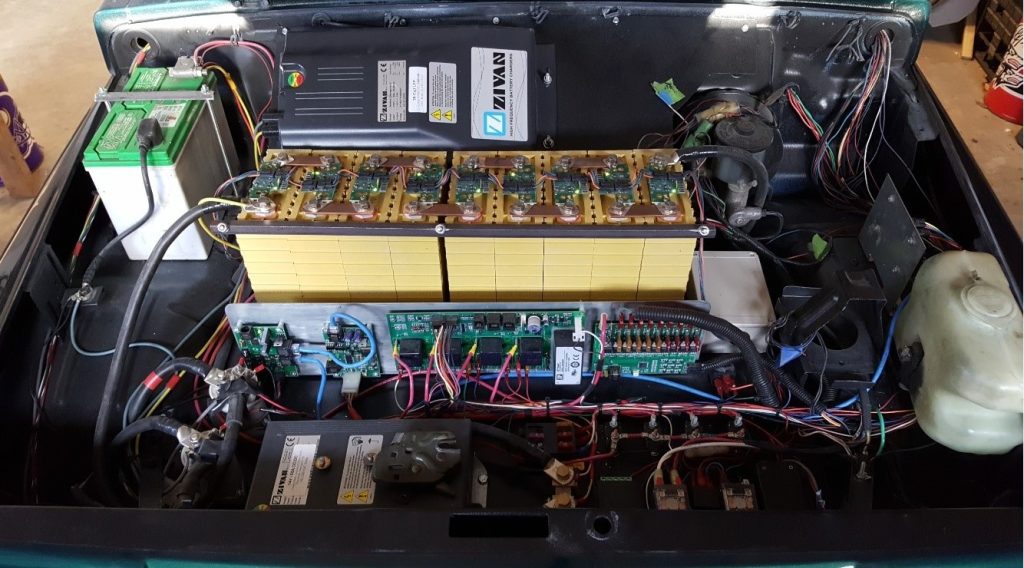
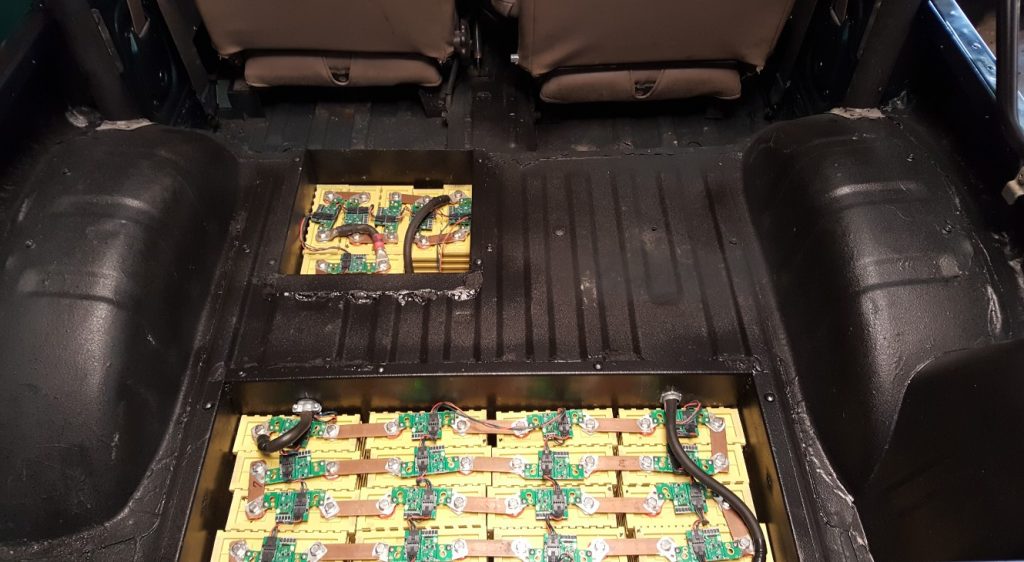
Selecting the battery type, whether using lead acid or lithium is an expensive decision. Lead acid isn’t that much cheaper than lithium and the life span is considerably less. Advantages of lead acid batteries are you can get a battery from about anywhere, if you run empty – you can sit for about an hour and start back up again for a limp home situation, and they do not require battery management systems to keep them balanced. Cold weather can reduce range by as much as 40%, the lead acid choice requires 3X more space, and weight is about 3X heavier per kilowatt hour. Lithium cells can be acquired from salvaged wrecks or from conversion companies that stock lithium cells. You must read the specifications and understand what type of cell you can/should use. For EV use, you need a minimum 3C discharge capacity. This means that for 100 Amp hour capacity you can draw 300 amps constantly until the battery is discharged without damaging the cell. Most cells have a 10C for 10-15 seconds. If you have a motor controller that can deliver 600 amps to the motor then you would need a 200 Amp hour cell to prevent cell damage at wide open. While this is wide open, this rule of thumb works very well to allow your cells to breathe and reduce the chance for damage. When using lithium you MUST have a battery management system (BMS) that turns things on/off based on individual cell voltage. If one cell goes out of whack then the whole battery bank has the potential of following quickly. Don’t mean to scare anyone off but the BMS is what gives you the peace of mind all is good. Our experience is when using very good cells that you will not have much to worry about for the next 10 years. Once the battery type is chosen, check your measurements to see where you can install the cells. Watch for ground clearance and chassis depth. The Samurai is limited to battery locations. I removed the gas tank and cut out an area above the gas tank to insert a galvanized box that was about 12” wide x 13” deep x about 35” long. I was able to put 20 lithium cells in here at 100 Amp hour capacity. I cut out an area 12” x 12” x 13” deep between the transmission and left rear tire and transfer case. This housed another seven cells. We built a platform that went over the top of the motor/controller and housed all of our electronics and an additional nine cells. Totaling 36 cells at 100 Amp hours and connected in series (positive to negative throughout). Taking 36 cells X the nominal voltage of the LiFePO4 cells at 3.2 Volts X 100 Amp hours X 0.8 usable energy divided by 1000 will give you 9.2 kilowatts. For this vehicle we are looking at 3 miles per kWh or about 28 miles range. This worked for farm use but doesn’t have the range for driving back and forth to work. We stayed with this battery storage to make sure the whole system is working properly. We have since located a different cell that is smaller in size but we are also increasing our Amp hour capacity to 31 kWh or about 93 mile range. Adding more smaller and more powerful cells meant we had to build an additional battery box that is 15” wide X 35” long X 8” deep and it will fit perfectly behind the seats while still giving us some cargo capacity. The loss of room (for me anyway) and the gain of range was a win.
Next is the sizing of the DC/DC converter. The converter is similar to that of a generator/alternator with an ICE. The DC/DC converter takes full pack voltage and converts it to 12.8 Volts or that of an auxiliary battery. This is to operate the lights and any other 12 Volt requirements. You have to add up all the possible 12 Volt draws such as lights, radio, contactors, etc. and then add about 20% for safety. The Samurai brakes are working about as well as the original system; however, if they were a bit stronger it would be nice. Because I know this I do take a little extra care and allow for a little less reaction time (not much less). The first Samurai I converted did require a vacuum pump and not sure what the differences were as they were both the same model year. The vacuum pump does require more amperage draw and will constantly turn on and off. It will suck down a lot of resources over the course of time. You may need to look at adding a vacuum booster to your braking system if it relied on the ICE to assist the brakes.
Heating and AC require major battery resources. Choosing the Samurai helped me with eliminating the need for air conditioning since we can remove the top and doors. If AC is a requirement you can order motors with double ended shafts and the controller choice has to be able to maintain 700 rpm’s to operate the AC while the vehicle is stopped at a stop sign or light and still provide cool air. Heating, on the other hand, is necessary to meet the highway safety standards. The heating system is primarily needed to defrost the windshield. Any additional heat for the Sammy would be wasted and hard to heat the whole cabin. Basically, dress in layers to keep warm. We plan to put a 4000 Watt inline water heater element into a reservoir and circulate through the existing Samurai’s ductwork. Some have put ceramic heaters in where the finned core was but 1500 Watts is not much to keep the occupants warm.
If it sounds intimidating it is on the first conversion. When we built our first there were several conversionist and they all put together packages. What they do is put together some basics such as motor, controller, converters, but leave out the little things that add up such as contactors, relays, wire, connectors, tools. By the time you get into the project and realize you are missing some things it can get very frustrating. Especially, when you find you are missing something order it and wait – then after installing that part you find out you are missing something else. It is the time element and unexpected costs that make your project start to feel like a money pit. At least until you take that first spin around the block and that electric smile makes it all worthwhile. I have attended several Cars and Coffees with different conversions and have always been well received. It is amazing how more power whether electric or ICE has that competitive edge and that competitive edge leads to a greater understanding of how we can progress together. Like back in the 60’s and 70’s ICE mechanics learned how to make Detroit build better vehicles – we now have a new breed of shade tree mechanics doing the same thing today and at a much faster pace. The one thing I do miss having grown up in the 70’s is the sound of power. When we raced our 33 Ford roadster at the dragstrip you could hear a pin drop in the stands. Everybody could hear the tires spinning and the smoke from the burnout but it was missing the noise factor.
3: Tell us where you are in the project and what you still have to do. You can include specs and data of the vehicle. What is your next project that you have in mind.
We are currently replacing the battery pack to make the Sammy more local friendly. Once this is accomplished we will license it again for the road. We have found that local driving requires about 80+ miles range. This allows for heating, AC, and having a little fun when applicable. Zero to 60 will be in the 8-9 second range which is better than the original ICE. Our roadster was one of the first to do 0-60 in 7.2 seconds and that was very impressive back then. We know how to beat that in less than 10 years through a combination of higher voltage and more AC drives instead of DC. AC drive systems can achieve 10,000 to 14,000 rpm’s and with the right gearing can achieve 0-60 times in less than 3 seconds. The development of our ignition system, our DOT lighting board, our gauges, and our battery management system have helped us make conversions simpler and the conversion process much quicker.
We already have another truck project where we have remove a Nissan Leaf drive system and plan to implement it in a Korean built pickup similar to the Ford Explorer truck version. Using the inverter and AC drive system we will have heat and AC from an air to air heat pump system. We will be putting 100 LiFePO4 cells with graphene into this system. This will give us about 300 miles range and about 10,000 cycle life from deep discharge to full charge. We expect this system to perform at least 10 years or longer.
Thank to Ken Clayton of Green Cycle Design Group http://www.greencycledesigngroup.com/index.html
Dave Daneault 4x4setupMagazine